DIY Yarn Ball Winder from Scraps

My attempt to have a yarn ball winder .

Yarn ball wider revisited - specifications-part 1

Some specifications about my yarn ball winder.

DIY entryway table

A place to put your keys, phone and mail.

Legwarmers/ Boot Cuff

Beginner's cable knitting project

Showing posts with label Woodworking. Show all posts

Friday, April 10, 2015

Creations of yarn ball winder from knitters around the world

This post will be a collection of images from all over the world of DIY yarn ball winders . Congratulations to all of you that made one. Enjoy it.

1.And the first image is of Donna's yarn ball winder. She made it also beautiful not only functional.Good job Donna.


Youtube video showing the rotation of the my DIY yarn ball winder

I finally got around to make a video showing my winder in action in order to exemplify the movement of parts . Enjoy and email me if you have questions.

Tuesday, October 14, 2014

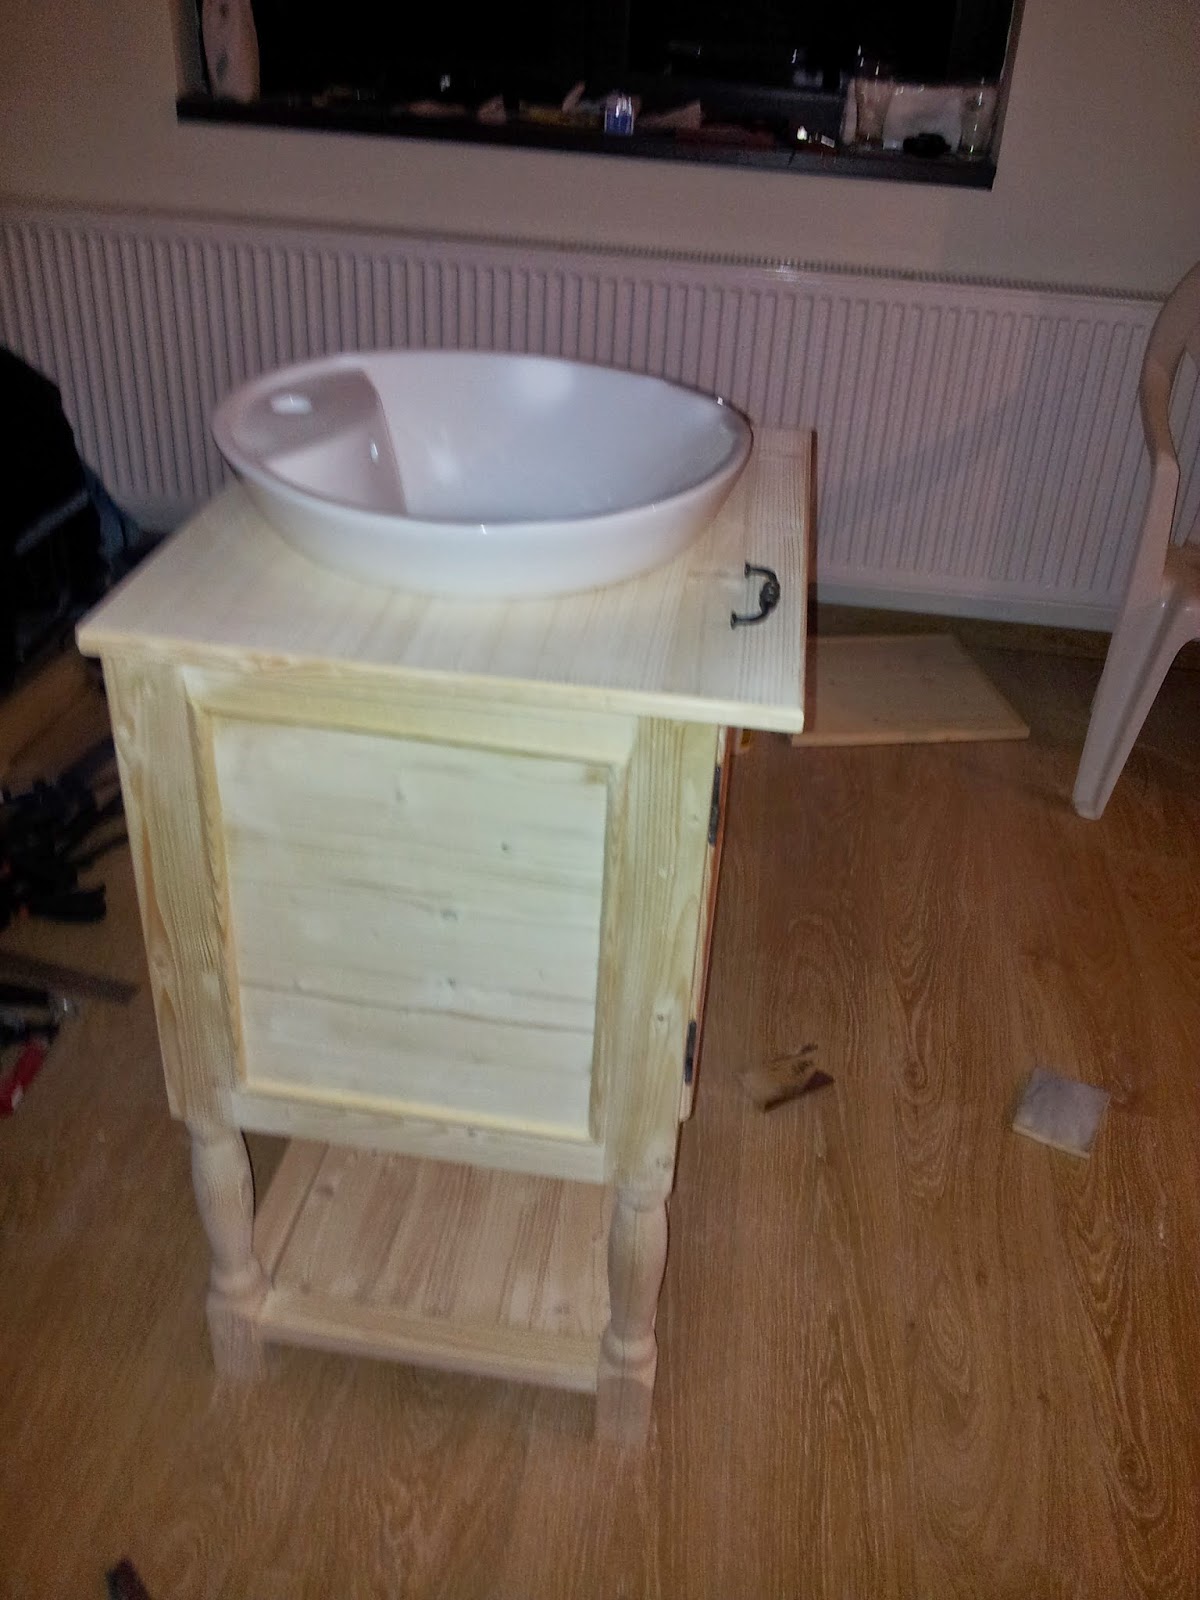
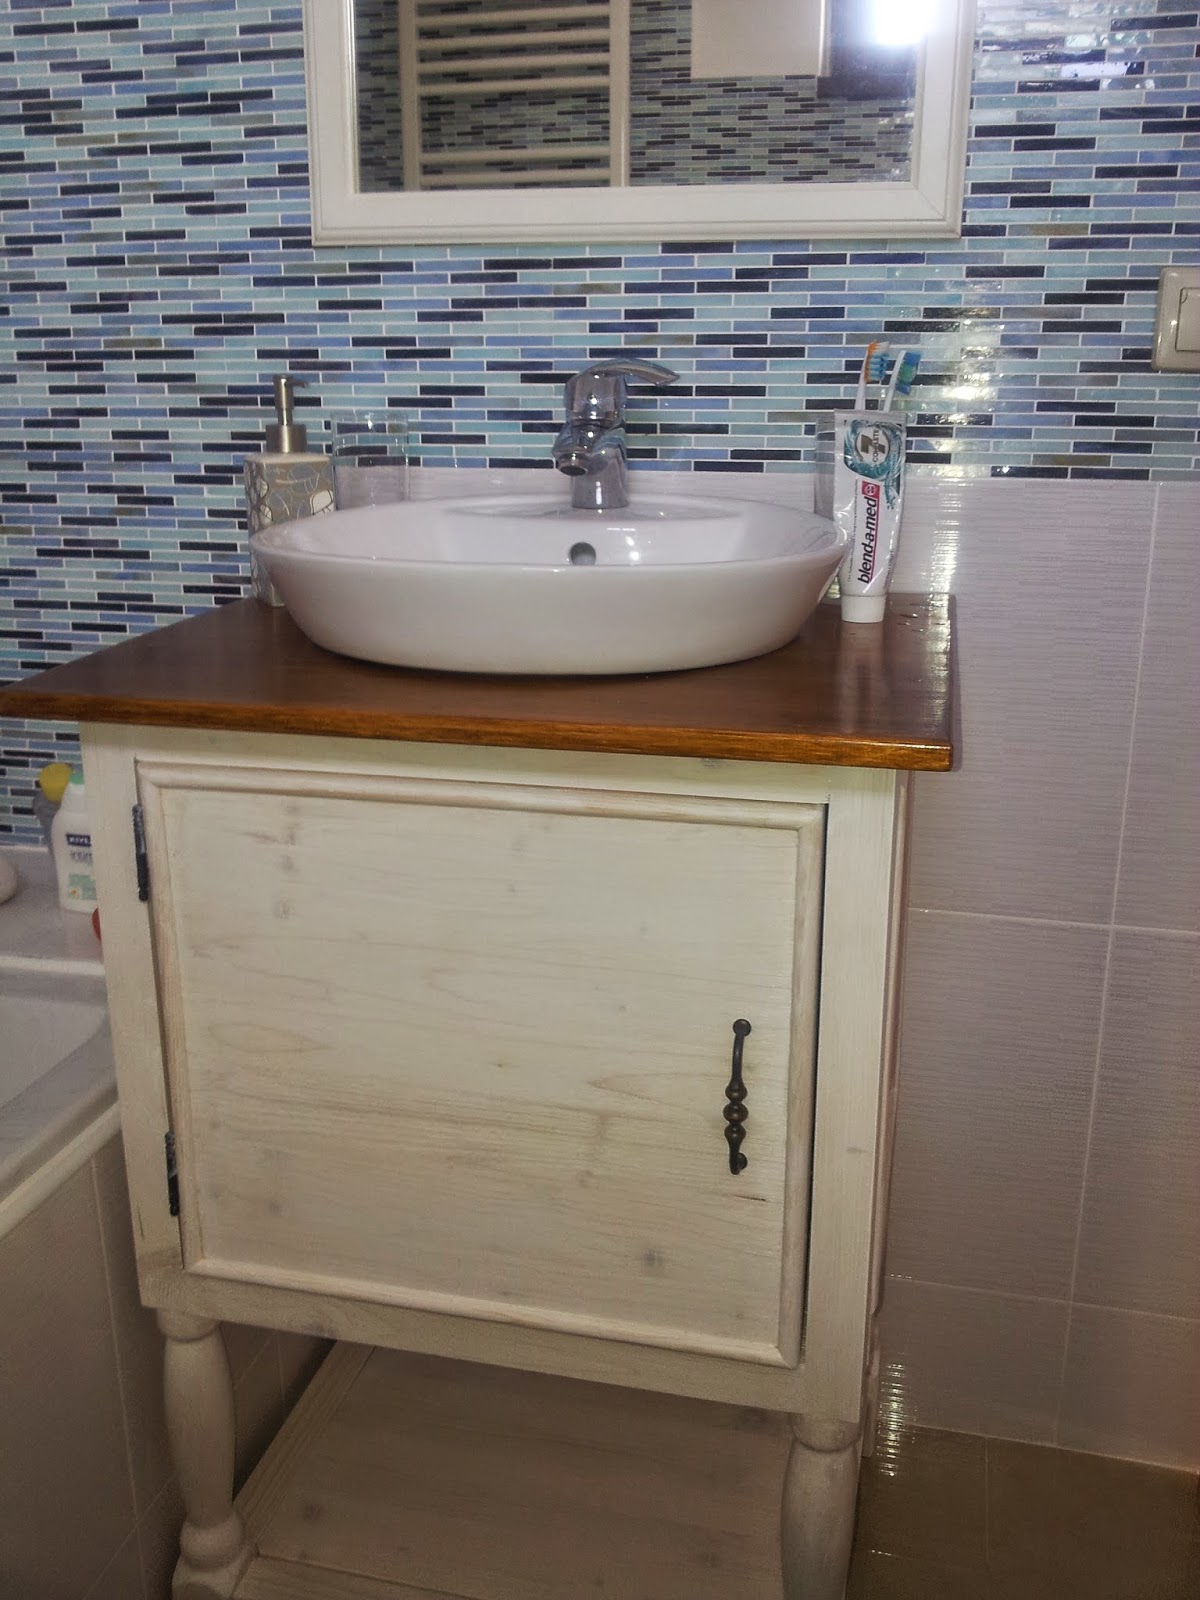
Yet another Pottery Barn inspired bathroom vanity and Bathroom

This is not a DIY post because there are already a lot of them on this type of vanity.
This just to show my version of it.

I first came across the DIY project from DIY Diva and then looked over at Pottery Barn website for more inspiration.
In my country however is not common to have tile counter-tops so I went with a different version .Also the lack of space in the guest bathroom prevented me to have a double door .

Another obstacle is that we don't have Kreg Jig . Sure I could have bought one online but with taxes and shipping I would have payed much more for one. In this case I went with the old fashion of furniture making , meaning dowels and wood glue.

In our DIY stores you can't find table legs and neither can you order them online from a shop so in my attempt to make it look at least like the one from DIY Diva, I end up purchasing 2 symmetrical pine staircase spindles that I cut in half ( resulting 4 so called legs).

After this I just made up a box unit without back ( Ididn't need to bother because it would have been against the wall and plus less fuss with the plumbing.

Because it looked a little bare, I added a round molding to the inside panel also to mask some imperfections (I know there are there even if at first glance you don't notice -but considering this is my first attempt in building furniture with dowels it came out OK). For the miter cuts, I used my miter saw (was the only tool I had at the time besides the cordless screwdriver - you can see them listed in the Woodworking - Power Tools

After cutting the door and applying molding as well for a more put together look, I choose the hardware (not cheap for just 3 pieces). Regarding the actual sink I went with the cheapest I could find that had a pyramidal construction that allowed me to just cut a circular hole in the top of the vanity .

After assembling everything, I did a fitting before sanding down and painting.
For the paint I went with a water based semi-opaque white finish so it would allow for a glimpse of the wood grain and proper primer and for the vanity top I went with a Hazelnut stain and Polyurethane clear lacquer just because it would be more in contact with water.

This would be the end result and installed in the bathroom.Of course hubby had it's part in this project with sheer brute force to clamp the pieces for gluing and for the plumbing as well. You can notice from the images that because I went with a cheap sink , it's not perfectly flat and it's not sitting against the top all over the rim, but I decided I can live with this imperfection mainly because it's noticeable only when you look at it from the sink level.

For the mirror above the sink I used a picture frame -Virserum from Ikea and installed a mirror that I got cut to the required size at a local glass shop. And because I needed more storage, I build also a ladder type shelving system ( plans you can find on Ana White) and added the wicker baskets to complement the whole look (plus to hide stuff -under the vanity is where I keep my hairdryer and curling irons).

Wednesday, October 8, 2014

DIY front door mat


Because I live in the countryside ( sort of countryside considering the village is 10 km away from the Romanian capital) it's very important to have a sturdy front door mat.
Since moving here 2 years ago, I had changed several door mats because they weren't strong enough to withstand the forces of natures or my dogs that liked to play with them.

Our house is uses a wood-burning heating system for winter time so we have to supply ourselves with wood during summer months. This year we got some scrap oak wood from a company that produces wine barrels and among these pieces of scarp were thin long strips of wood of slightly different thicknesses.
I once got a newsletter email from Lowe regarding a DIY floor mat in bright colors that used threaded rods so I thought using that idea with my pieces of scrap wood.

I decided upon my length and width of mat and went to a local store to buy the necessary threaded rods. When I did a total for the 7 rods that I needed ,suddenly the entryway mat was not so cheap anymore.
Instead of getting discouraged I decided to purchase beech wood dowel rods that were 0.70 USD each instead of 2.00 USD for the metal threaded rods.

After cutting all pieces to the proper length, I did a mock-up to see how the different thicknesses would fit.
I do own an electric hand held planer but it would have been to difficult for me to bring all the pieces to the same thickness because it's not easy to maneuver. It works OK for rough bigger pieces but on biscuits of wood not possible.

Now keeping the mock up in place, I made a stop block template to use with the drill press ( it's not really a drill press -it is a foot that has an old drilling machine of my father installed). So what I did is get a piece that was slightly larger than the width of my mat pieces and screwed on a stop block and then installed it in the vise that came with the drilling foot.


Now in order for the pieces to fit properly use a drill bit that is larger than the diameter of your rods ( it will give you some wiggle space to place them).In my case, my rods are 8mm in diameter so i used a 10 mm wooden drill bit. You can see here the positioned piece in the vise and against the stop block.

The pieces must be drilled in columns from your mock up mat,allowing to insert the dowel rods easily.


After all rods have been inserted , since the pieces are not glued on to the rods and are moving freely, I decided to add a frame that holds rods in place ( drilled corresponding holes through the frame and passed the rods with wood glue through them and after hardening , I cut them flushed with the surface of the frame.

I decided to use the electric hand held planer to round up the edges of the frame but as I told you it's hard to handle and upon coming to a corner it slipped away and bit a lot more than the edge.

Too late to fix it now since all was glued up. I decided to live with my mistake and never to use the electric planer to round up the edges ( i should've used the sander instead -Lesson learned)
After this, I sanded down the surface and used an outdoor clear coat lacquer . I figures that it will see a lot of foot wear and it may need resurfacing maybe in 2 years and it would look to messy if it had on a stained finish.

That is just my preference and I'd like to think that I spared myself some hard work in the near future.
So this is the end result. It is hardwood , weather proofed and dog proofed ( it's heavy enough , not bendable so they can't chew on it).

If you have build your version, I'd like to see it and have it in my featured section.

Wednesday, September 17, 2014

DIY Entryway table

Hi everyone,
I finally got around to post some of the things I made to furnish my empty house. If it's not obvious by now, we moved into our new build house a while ago and since we have been living previously in a furnished rented apartment, we didn't have much to bring into the new house except for the cats ( I hope to present them to you all one day).

Our house has a narrow hallway at the entry through the front door and also a radiator on the wall.The problem was that every time you entered , holding keys, phone or everything else,you had to put them down on the floor in order to take of the shoes. So I thought of attempting to make my own entryway table that would have to be tall enough so it wouldn't interfere with the radiator so here is what I did.

After looking over the internet , I found some plans on ana-white.com that I adapted to my needs.

This is the image that inspired to make my own version. Full post can be found on Jaime's Costiglio blog inspired also after a Pottery barn table.
This is how my table end up looking .

Since the table is pretty narrow, I had to secure it to the wall with L brackets attached to the underside. As you can see I didn't make it so colorful as a child's play table .
And this is how it looks decorated. I must say that I had no idea I'll end up using the small paintings ( I had made them for one of the bathrooms ). Since we live in an open field, the flowers are meadow wild flowers.

The frame I had found on a flea market and painted it white and add a mirror to give the illusion of a larger hallway.
The green candle lantern is made by me by gluing some left over wood . I had seen a similar thing in a house decorating store here in Bucharest and after looking at the price tag, I decided it's best to make my own. So I end up buying from that place just the glass vase and the candle at a fraction of a cost since they were on sale.

After this build, I must decide what room to tackle next. I usually have a very limited budget and many times you;ll see me using scraps of wood or anything else I have at hand.See my next post about the entryway door mat.

Wednesday, September 10, 2014

Yarn ball wider revisited - specifications-part 1

I have received requests to post specifications and some steps in making the Yarn Ball Winder ( see the first post about it here)

Now for those who will want to build a similar one here below is a picture with the dimensions of the one I have build .Measurements are in centimeters but I figured you can use the calculator to transform to imperial .

Since the photo is rather small, I took others to exemplify the other measurements. For example the photo below is a view from the side of the yarn ball winder so you can see better how everything is attached.

Let's start with the number of threads, washers and nuts that I have used.
First of all I must mention that since I had no idea of the width of the materials I had to pass though , I couldn't buy a threaded screw ( since they come in different lengths)so I opted to buy a threaded rod of 8 mm in diameter that I cut to size according to my needs.

For the big wheel I used 4 washers,3 type M8 locking nuts and the threaded rod is cut to 7 cm length ( M8 refers to the fact that they are used for an 8mm thread)

For the small "wheel" ( it's actually 2 wheels glued together) I used 5 washers ,4 type M8 locking nuts and the threaded rod is cut to 13 cm length.

For the spindle wheel I used 3 washers , 2 type M8 locking nuts and a threaded screw like in the picture below ( still 8 mm diameter).

I also used an L bracket 2 cm wide and 10 cm sides, 2 small wooden wheels of 4.5 cm in diameter and 1.5 cm thickness, 1 rubber door stop 2.5cm height that is a truncated cone shape as you can see from the photo below, the base is larger( 3.1 cm diameter) than the top part that is in contact with the spindle wheel ( 2.9 cm diameter)and 1 meter of rubber coated laundry rope ( if you can find a round rubber gasket of the size you need it will be better not to have the knot visible)


The pine board that I used to cut the large wheel and the spindle wheels are 1.8 cm thick and the base board on which everything is mounted is 2 cm thick.

Before you start anything you got to understand how this winder works. First the larger it is the big wheel, the ratio is increased meaning you have to turn it less and the spindle turn faster ( less movement from your part). The winder works like this : the large wheel and smaller wheels glued up they move together , being connected by the belt ( laundry rope) , while the door stop on top of the glued up small wheels has a a fixed position( he is jammed on the threaded rod between 2 lock nuts and washers ( please see pictures) so he will never move.

The L bracket is screwed on the the small wheels making it a part of the moving mechanism. The spindle wheel is free to rotate on the bracket ( the lock nuts are not very tight in order to allow it to rotate). As you can see from the image, the spindle wheel is in contact with the door nob that has a stationary position.

Because you spin the big wheel, which causes the smaller wheels with the bracket to spin faster , the spindle wheel being in contact with a fixed element, is forced to rotate around his own center ( the point to which is attached to the bracket).
On the next post I will describe some steps in creating your own and some suggestions for substituting elements.

If you think you didn't understand the working mechanism behind the winder, please let me know and I shall try to make a video to demonstrate what I have written above.

Monday, December 9, 2013

DIY Yarn ball winder from scraps

Here it is people.
I finally managed some time to post this craft that I made from scrap.
I was always envious of the yarn balls other people presented on the internet. So ready to knit without bouncing the ball.
As for the yarn swifter, I took my research and documented several models on the market.
Of course nobody list anything for free ( plans I mean).

So I had to do some reverse engineering based on photos and youtube videos.
I decided in the end to take the easiest way out ( the one model that involved less work).
I must state first that I live in a country where the art of DIY has been somewhat forgotten so all I had to work with are materials that I could find at a local DIY store ( I realize that it's impossible to have everything but it was the best store that carried almost all that I needed - I'm not making a commercial but if some other Europeans read this post , it's about Hornbach ).
This is what I came up with( notice that I choose the Strauch belt drive yarn winder for inspiration)
Now to state the components of my yarn winder:

1.The base is a leftover beech board from the staircase.
2.The big wheel is made of pine that I cut with a jig-saw and then carved a middle groove with a hand saw.
3.The smaller wheel is actually 2 beech wheels that I bought at the store and glued together.
4.The metal bracket was originally an L bracket with some holes in it that I had to hammer down and drill new holes to fit my needs.
5.The belt drive is in fact laundry rope with a synthetic fiber on the inside.
6.The grey rubber shaft nob that allows for the yarn spindle to rotate is a door stop.
7.The counter weight that is attached on the end of the metal bracket is a left over ball bearing from a cabinet wheel ( the wheel broke and I had the ball bearing left)
8.The yarn spindle and yarn guide is made from a broken broomstick

I added some nuts and bolts, washers of course and this is the end result.
It's not perfect or fantastic but it does the job just fine.Here you can see the results of winding a ball. A nice crosswind center pull ball ready to be knitted.
PS : After a while , Pepper doesn't seem to care about my new toy.

See the specifications and more pictures in my next posts here