This is not a DIY post because there are already a lot of them on this type of vanity.
This just to show my version of it.
I first came across the DIY project from
DIY Diva and then looked over at Pottery Barn website for more inspiration.
In my country however is not common to have tile counter-tops so I went with a different version .Also the lack of space in the guest bathroom prevented me to have a double door .
Another obstacle is that we don't have Kreg Jig . Sure I could have bought one online but with taxes and shipping I would have payed much more for one. In this case I went with the old fashion of furniture making , meaning dowels and wood glue.
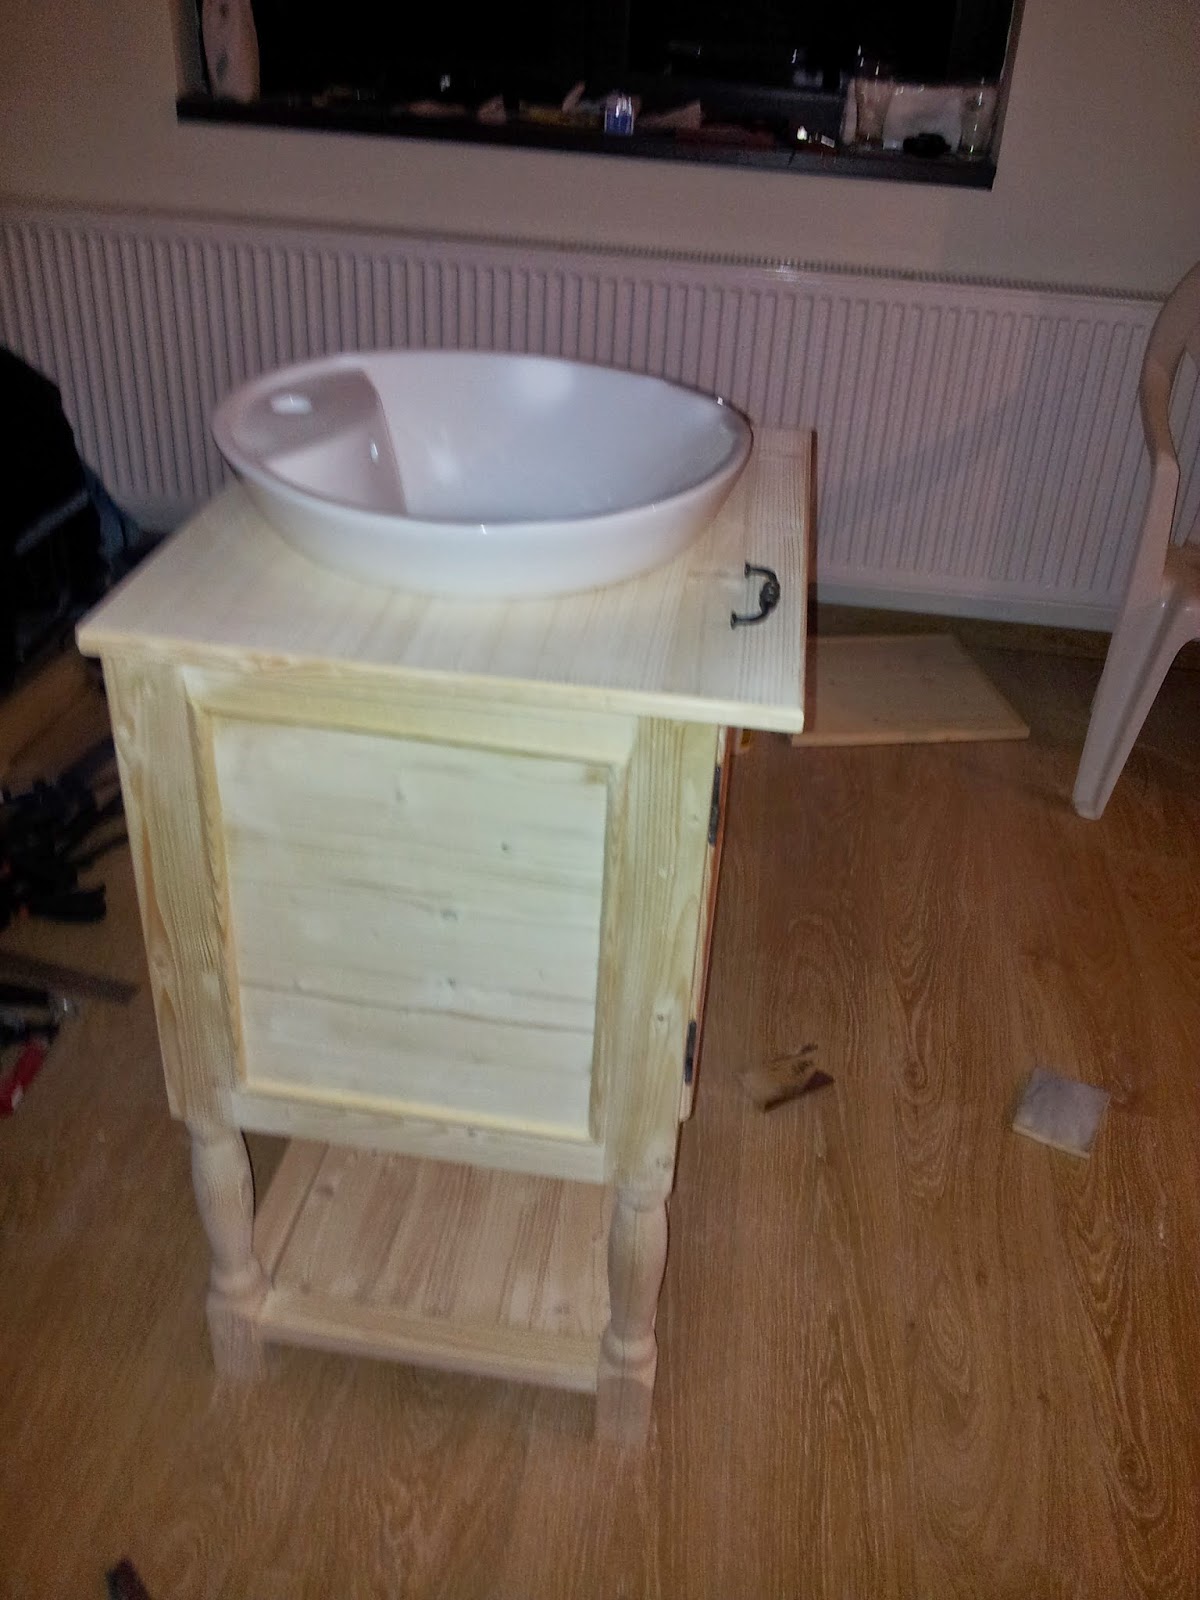
In our DIY stores you can't find table legs and neither can you order them online from a shop so in my attempt to make it look at least like the one from DIY Diva, I end up purchasing 2 symmetrical pine staircase spindles that I cut in half ( resulting 4 so called legs).
After this I just made up a box unit without back ( Ididn't need to bother because it would have been against the wall and plus less fuss with the plumbing.
Because it looked a little bare, I added a round molding to the inside panel also to mask some imperfections (I know there are there even if at first glance you don't notice -but considering this is my first attempt in building furniture with dowels it came out OK). For the miter cuts, I used my miter saw (was the only tool I had at the time besides the cordless screwdriver - you can see them listed in the Woodworking - Power Tools
After cutting the door and applying molding as well for a more put together look, I choose the hardware (not cheap for just 3 pieces). Regarding the actual sink I went with the cheapest I could find that had a pyramidal construction that allowed me to just cut a circular hole in the top of the vanity .


After assembling everything, I did a fitting before sanding down and painting.
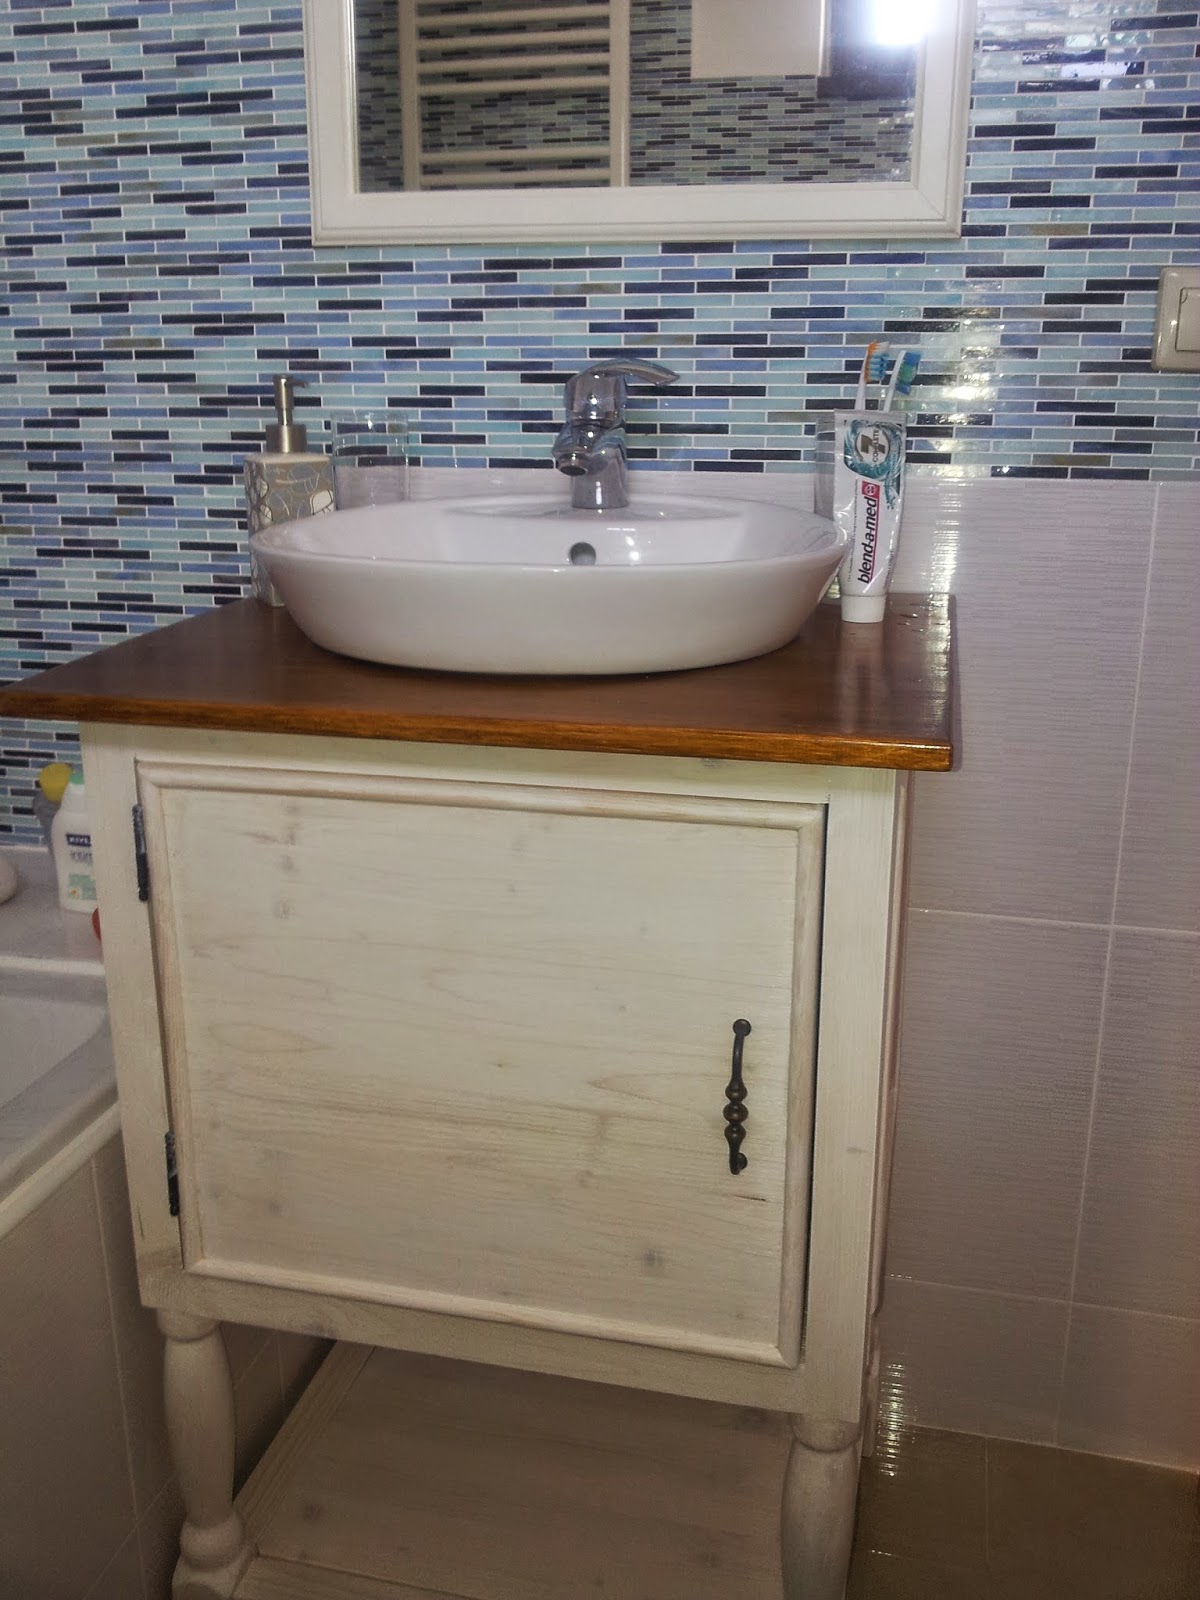
For the paint I went with a water based semi-opaque white finish so it would allow for a glimpse of the wood grain and proper primer and for the vanity top I went with a Hazelnut stain and Polyurethane clear lacquer just because it would be more in contact with water.
This would be the end result and installed in the bathroom.Of course hubby had it's part in this project with sheer brute force to clamp the pieces for gluing and for the plumbing as well. You can notice from the images that because I went with a cheap sink , it's not perfectly flat and it's not sitting against the top all over the rim, but I decided I can live with this imperfection mainly because it's noticeable only when you look at it from the sink level.
For the mirror above the sink I used a picture frame -Virserum from Ikea and installed a mirror that I got cut to the required size at a local glass shop. And because I needed more storage, I build also a ladder type shelving system ( plans you can find on Ana White) and added the wicker baskets to complement the whole look (plus to hide stuff -under the vanity is where I keep my hairdryer and curling irons).


0 comments:
Post a Comment